By Cassandra Balentine
Roll-to-roll wide format printers are the go-to solution for printing floor graphics. Many factors must be considered to ensure a successful application, from the design to surface, ink, media, and lamination requirements.
Floor graphic media is engineered to withstand heavy foot traffic, which means it tends to be thicker, more textured, and coated with slip-resistant surfaces. “These textures—ranging from matte grit to embossed vinyl—can influence ink lay down and adhesion. Printers must handle these materials without causing printhead strikes or uneven ink coverage, which is why adjustable printhead height and media feed accuracy are so important with floor graphics,” says Adam Tourville, channel manager, Fluid Color, LLC.
“Floor graphics take a beating—foot traffic, cleaning, the works—so they’re built tougher and should be textured for slip resistance,” adds Roy Ritchie, president, DreamScape. “That added texture and thickness means you have to be a little more intentional with setup. But when done right, the results are visually striking and physically durable.”
Compared to banner or wall vinyl, Tourville explains that floor graphic media can also have additional topcoats that affect how ink sits and cures. Some are more absorbent, while others repel ink if not properly matched with the right chemistry. These unique characteristics mean printers must be calibrated for optimal temperature, ink volume, and curing speed to ensure proper bonding and visual clarity.
Typically, floor graphic media is a thicker calendared vinyl product. “Media manufacturers generally add texture to the laminate and not the print material to prevent slips and falls. This gives print operators very little learning curve and requires less calibration to get a great print result,” offers Tony Simmering, product manager, Mutoh America, Inc.
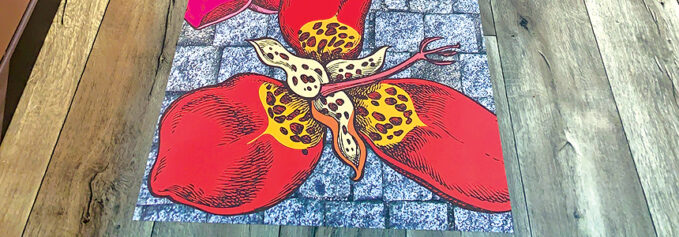
Above: Output printed using a Canon Colorado M-series UVgel printer.
Inks
While many materials are “universally” compatible with solvent, eco-solvent, UV, UV gel, and latex inks, Michelle Kempf, VP, sales and marketing, Continental Grafix USA, Inc., cautions that there remain uncoated options that may not be suitable for all printers. “It’s best to do your homework before you have an expensive roll that won’t work with your printer.”
Ritchie agrees, noting that latex and UV inks tend to be the top choice because they cure fast, hold up well under traffic, and pair nicely with slip-resistant coatings. “Dry time matters more than usual here, especially when you’re skipping laminate. Whatever combination you choose, durability and safety come first.”
There are nuances that are helpful to understand when selecting the best media selection for the job at hand. “For example, solvent/eco-solvent inks provide strong adhesion with great durability and wear resistance, especially for one-step floor graphic material, provided the film has the proper receptive coating,” says Kempf.
Eco-solvent inks are known for longevity and durability, which allows for high-traffic interior and exterior graphics. The biggest limitation is production time as there is usually an outgas period. Simmering recommends paying attention to this to ensure the best quality when post-laminating and applying to the floor.
Applications requiring more flexibility or for graphics applied to uneven or soft surfaces may benefit from a longer curing time but softer hand feel and better elongation properties. “Solvent and eco-solvent inks also work well with PVC films, offering good durability and color, but may need extended dry times and careful ventilation,” shares Tourville.
Latex inks are a more environmentally friendly option, but offer a bit less durability on one-step floor graphics as compared to other solutions. “In some cases, the high heat required for curing may not work well with certain media types. Ink is dry/cured immediately so no time is needed if laminating for a two-step solution is required,” offers Kempf.
Kempf feels latex is ideal when laminating floor graphics because the dry time is instant since no outgassing is required, which allows for an uninterrupted workflow from printer to laminator, however the higher heat may negatively effect some thinner substrates. Solvent/eco-solvent inks provide excellent adhesion, but require 24 to 48 hours to outgas prior to laminating, which may elongate production time.
UV LED inks paired with calendared vinyl or textured PET films are among the best combinations for floor graphics due to their instant curing and excellent adhesion, shares Tourville. “This is ideal for short run or on demand jobs where speed matters. UV LED also performs well on synthetic textiles and some non-PVC films, provided the surface has been treated or coated for ink receptivity.”
Simmering says UV inks can provide very quick job completion but have limited durability due to the nature of the ink as well as the ink being a surface adhesion. “UV inks are becoming popular for printing floor and wall graphics and do not require any significant curing or outgassing period before lamination; this method is usually limited to indoor and lower traffic jobs.”
“UV-curable inks offer excellent adhesion on a variety of floor graphic material, and are also durable and wear resistant without lamination,” agrees Kempf.
Angel Georgiou, senior product marketing specialist, large format, Canon U.S.A., Inc., adds that UV and UVgel inks dry instantly and are very durable for print-and-go floor graphics. “UV inks can also be used on aluminum products, which are suitable for asphalt or high-traffic outdoor areas.”
UV LED inks cure instantly, which reduces the risk of smudging and eliminates the wait time associated with solvent or latex drying. “UV inks also build a slightly raised surface that pairs well with overlaminates to enhance slip resistance and tactile performance,” says Tourville.
According to Simmering, it is important for the ink to maintain some level of flexibility so it can be laminated; a completely rigid ink will likely crack.
Lamination Considerations
Floor graphic media is available in one- and two-step configurations, which determines whether or not they require lamination. One-step floor graphic media solutions are designed to apply on a floor without additional protection, while two-step options involve two materials layered together for the desired outcome.
Mike Aldrich, product manager of digital print solutions, General Formulations, says the texture of the laminate, or in one-step applications the film, provides a unique finish mixed with functionality for non-slip and non-skid applications.
Ritchie stresses that for standard vinyl or smooth film, a certified overlaminate is required to meet safety standards. “Be sure that your products offer both the ANSI A137.1 and pendulum DCOF slip certifications to ensure you are protected legally from any potential claims before skipping the topcoat.”
Slip resistance is critical. “Always test the combination of media, ink, and laminate to confirm slip resistance meets safety standards like UL 410 or ASTM D2047. No need to get sued,” stresses Tourville.
Tourville feels that laminated graphics offer more flexibility in choosing print media since the laminate provides the slip resistance, abrasion protection, and in some cases, UV stability. “In this case, the focus shifts to ensuring ink compatibility with the laminate adhesive and that the print is fully dry or cured to avoid tunneling or delamination.”
“The advantage of using a two-part floor graphic system with print film and laminate is not just the versatility of choosing the right adhesive for the job, but also that the print is encapsulated under the laminate layer and protected from cleaners and contact, so your graphic stays vibrant through the life of the campaign,” adds Aldrich.
Aldrich points out that with a base-plus-laminate system, the smooth base layer runs as any other print media would and doesn’t require any modification of the printer or cutting equipment to handle the media. “By changing out the laminate layer, the versatile base film then becomes a solution that can be used on floors, counters, tables, and beyond.”
Outgassing inks can compromise the integrity of how the laminate layer bonds to the base film and potentially cause issues with bubbles or distortion, or a complete delamination of the job. “While the extra step of laminating comes with this concern, the overall durability of the image is protected by the additional layer, leading to a better looking and longer lasting graphic. Just give yourself the extra processing time to mitigate those risks,” advises Aldrich.
Unlaminated floor graphics rely on the media’s surface coating for durability and slip resistance, making the choice of media and ink combination critical. “UV LED inks are especially effective here due to their abrasion resistance and ability to build a lightly textured surface that contributes to slip safety,” says Tourville.
Ritchie points out that if the media is engineered for slip resistance—like DreamScape’s Wall+Floor Wrap line, you can skip lamination. A few benefits he lists include lower material/production costs, fewer materials to inventory, and an overall faster delivery for installation.
Georgiou finds that using a print-and-go—or no lamination necessary—product is the easiest option for floor graphics. However, she admits it’s not always the best choice depending on the installation location. “In some areas, laminated materials with a safety texture are a better choice. Also, using rounded corners instead of square ones helps the edges stay flat under foot traffic.”
Printer Role
The success of a floor graphic involves several parts, including design, media, laminate, and printing and finishing equipment.
When considering the vast array of floor graphic material on the market, Kempf points out that it’s important to be mindful of material thickness to ensure that your printer is able to handle the media properly without causing printhead strikes, which can result in expensive damage.
“There are so many great floor graphic solutions available, however not every solution is physically compatible with every printer,” cautions Kempf. “It’s vital to ensure that your printer of choice can accommodate the material thickness or texture. It’s frustrating and expensive for everyone involved when material arrives and production is ready to go, only to discover that the printhead can’t be adjusted. Proper adjustment puts the printhead high enough to avoid printhead strikes, but close enough to avoid banding and poor print quality.”
Simmering admits these medias tend to run on the thicker side, so it is important the printer is properly calibrated to the correct material and printhead height is engaged to stay out of the way.
“The printhead and carriage mechanism must handle varying media thicknesses without sacrificing accuracy. Printheads with variable droplet sizes and precision firing help maintain crisp output even on textured or absorbent substrates. Adjustable carriage heights are essential when printing thicker media with raised or structured surfaces,” explains Tourville.
Ritchie suggests always manually confirming printhead height. “Many printers automatically sense printhead height. If you are printing an unfamiliar material take a moment to verify that the recommended height is sensed. Keep in mind that any change requires a conformation of bi-directional alignment.”
A robust pinch roller or feed system is necessary to maintain consistent media tension and alignment. “Anti-static bars reduce dust and debris attraction, which is critical since surface imperfections show prominently. Smooth media advances from linear motors and precision-driven encoder systems ensure proper registration,” adds Tourville.
Tourville points out that take-up systems with adjustable tension help avoid skewing, particularly on longer runs.
It is important to ensure the media is tracking squarely through the print system and that the print leader is fully attached to the take-up reel before beginning production. “Even a slight variance in tracking can result in a mismatched pattern and potential job rejection,” adds Ritchie.
Using media with an anti-curl treatment or a structured liner helps maintain flatness and smooth feeding through the printer. “Before printing, it’s important to run a nozzle check and ensure proper printhead height settings to avoid smudging, especially with thicker calendered vinyl or textured films,” attests Tourville.
Floor graphics can be extremely high square footage jobs, therefore Simmering feels that having print systems where the print operator can utilize a take-up unit to automatically roll the material is critical.
Print speed also plays a role. Tourville recommends using print modes that balance quality with throughput. He explains that typically a medium pass mode ensures even ink lay down without pooling or banding.
Higher speed modes typically sacrifice resolution and ink density, which can lead to poor adhesion or muted colors on textured surfaces. “For floor graphics, especially those viewed close up or under foot traffic, we recommend medium- to high-quality modes that use slower carriage passes and denser ink lay down to ensure rich color and durability,” comments Tourville.
Additionally, slower print modes allow for more controlled curing in UV systems or better drying in solvent and latex systems. This reduces the risk of ink bleed, edge curl, or post-print defects like delamination, offers Tourville.
Most modern print systems are designed to handle applications like floor graphics at very high speeds, without special consideration. Once properly calibrated, Simmering says it’s up to the operator on what level of quality is best suited for that particular job.
Since one-step floor graphic solutions often have a texture, Kempf suggests running at a slower carriage speed and a higher pass count to improve the print quality and final output. On the other hand, she says with two-step solutions the printing is done on a smooth substrate and a textured laminate added can typically run faster and with less passes, depending on desired image quality.
Look Out Below
Floor graphics present opportunity in terms of marketing and wayfinding. However, proper preparation, production, media selection, finishing, and installation are important to the success and safety of this application.
Sep2025, Digital Output